Showing posts with label sewing. Show all posts

Thursday, January 22, 2015

How to Rock a Pinterest Project


Are your pinterest boards full of artsy DIYs and handmade awesomeness that never actually become reality? Do your attempts to sew that lace dress you pinned end up as a major fail? Is your closet full of craft supplies from half-finished projects or, even worse, projects you never even started?

If so, that's perfectly ok.

I'm here today to tell you that you can actually complete a pinterest project without having that major fairy dust that some people seem to have. You know that girl who shows up at a party with homemade cookies wearing handcrafted earrings and a skirt she whipped up under 30 minutes. If you follow my advice below, you can be her.

Well, maybe not completely.

Let's not get carried away.

Try one project first, and then move on from there.


Steps to Rocking a Pinterest Project


1. Choose your project with care. This first step is one of the most important parts of completing a project. Don't set yourself up to fail before you start. Take the following things into consideration.
    • How simple or difficult does the craft seem to be? Don't try to start with a complicated project if you don't feel sure of your skills.
    • How much time will the project take? Are you capable of dedicating that much time to working on it?
    • Do you actually want to complete the project yourself? If all you want is the finished product, you might be better off buying something similar.
    • Are the materials difficult to find/buy? And, will your budget allow you to buy everything that you need?
    • If the project is on a blog, check the comments below. People may have suggestions or comments about what worked or didn't work for them with the project.
2. Clear a time to make the project.
    • Block off time on your calendar for your project.
    • Allow yourself some extra time to finish the project. It may take longer than you think, and you don't want to have to rush the process.
3. Buy/gather the materials needed for the project.
    • Notice that this step comes after you decide the time that you are going to dedicate to making the project. You want to prevent supplies from unmade projects from gathering in your storage where all they will do is make you feel bad for never even beginning your project.
    • If you plan on substituting different materials than the ones the project calls for, be aware that it may change some of the steps you need to take while making the project. Don't let that stop you from being creative though. After all, that's why you're doing this.
4. Double check that you have everything you need.
    • There is nothing worse than running out of supplies in the middle of a project. It will throw off your groove. And, everyone who's seen The Emperor's New Groove knows that bad things happen when something throws off your groove.
5. Reread/Possibly print the directions.
    • Do you actually know how to do everything that the directions tell you to do? If not, this is the time to turn to youtube. A video of someone sewing a ruffle may be more helpful than just a description.
    • Keep the directions in front of you as you work. Especially if your project is complicated. You don't want to accidentally skip step number 2 and have to start over again when you find the problem at step number 15.
6. Enjoy the process.
    • Making your project should be fun. Yes, some parts may be difficult, but if you repeatedly get frustrated, it may be time for a break.
    • Consider listening to music or a podcast during repetitive tasks. Because you need something to do if you have to cut 100 petals out of an old map.
    • Maybe invite a buddy over to chat while you both work on projects.
7. Enjoy your finished project.
    • Congratulations, you have successfully finished a project. Even if it isn't perfect, you made it, and that's great!
    • Use it. Show it off!
    • If you like the finished project so much that you want to make another, think about what you would want to do differently next time. Maybe make a note about the tricky parts so that you remember later.

So, there it is. Hopefully, these tips will give you some aid while attempting your pinterest project.

Need some inspiration? Try one of our DIYs.

Take a quick look through our pinterest for some ideas and follow to see more added regularly. Now, stop just pinning things on pinterest and start making them.

Friday, January 24, 2014

DIY Doctor Who Sweatshirt

The DIY we're sharing with you today will probably only make sense if you're a Doctor Who fan or if you know someone who is.  If you're not familiar with Doctor Who, it's easiest just to say that it's a sci-fi show on BBC.  Actually describing the show would be almost impossible.

Although our love of the show isn't as full-fledged as some (we're still behind on the season and have yet to see the 50th anniversary special), we catch it whenever we can.

This DIY sweatshirt is great as a subtle, fun piece for Doctor Who fans.  It's a cute sweatshirt that's easy to make and involves little time.  This DIY is almost too simple to need instructions.


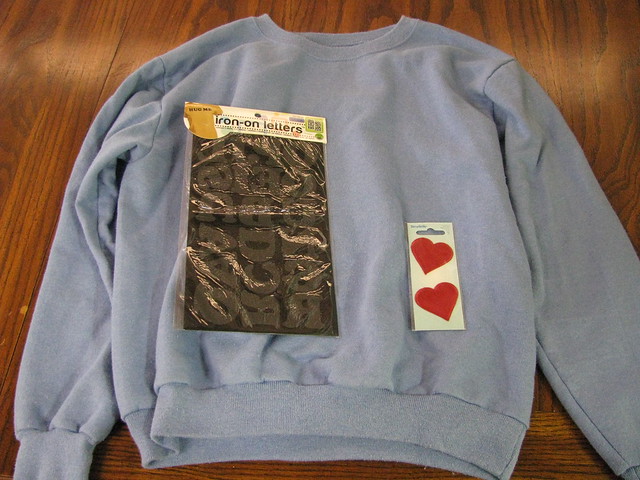
For this DIY, you'll need:
- a sweatshirt (we used a Hanes sweatshirt)
- iron-on letters
- two heart patches


Step One:  Following the instructions on the iron-on letters, remove your letters from the package and arrange on the sweatshirt.  Make sure to leave space for the two hearts.  Once you are satisfied with the placement, follow the instructions with your iron-on letters to adhere them to the sweatshirt.

Step Two:  Decide how you would like to attach the two hearts to the sweatshirt.  You'll either want to sew the hearts on or iron them on depending on what type of patch you are using.

Step Three:  Enjoy your sweatshirt while catching up on the 50th Anniversary episode.


This sweatshirt would also make a great gift for someone who likes Doctor Who.

Wednesday, February 8, 2012

Book Review - Sweat Shop Paris

Sweat Shop Paris


I'd never heard of the Sweat Shop in Paris when I saw this book available for review on Netgalley, but it seemed so interesting that I decided to take a look at it anyway.

The book Sweat Shop Paris: Lessons in Couture from the Sewing Cafe by authors Martena Duss and Sissi Holleis begins with the story of how the sewing workshop/coffee shop first came into being.  The Sweat Shop is a place where crafters can gather to exchange ideas and rent machines by the hour to do their crafting.

I'm not sure what I was expecting, but this book is not like any other craft or sewing book that I've seen.  Since my taste runs more to the simple and classic, I probably wouldn't be interested in any of the projects in the book.    However, the book intrigued me because in addition to a sewing section, there was also a section on knitting, a section on customizing pre-made pieces, one on decorating, one on how to use different techniques like weaving leather, another with recipes, and a final one with a guide to sewing, crafting, food, clothing and general useful yet cool places in Paris.

In order to be able to use this book, you'll need to have at least the basic of sewing covered.  I'd say that it might be frustrating for someone who is just starting out.  As far as knitting, I can't judge the difficulty of those projects since I don't knit.

I would say this book is definitely for someone who's interested in the more in and edgy side of DIY and crafting.  All of the projects are unconventional and feature techniques that aren't commonly used. If it just isn't quite your style, that's perfectly ok.  As much as I love Paris, it isn't quite for me either.  I'd suggest clicking through a few of the preview pages on Amazon.  If you like what you see there, then you'll love this book.

Monday, January 23, 2012

Book Review - Fabric-by-Fabric One-Yard Wonders

Fabric by Fabric: One Yard Wonders


When I saw that Fabric-by-Fabric One-Yard Wonders: 101 Sewing Projects Using Cottons, Knits, Voiles, Corduroy, Fleece, Flannel, Home Dec, Oilcloth, Wool, and Beyond was available for review on Netgalley, I couldn't help but want to review this book.  


This book by authors Rebecca Yaker and Patricia Hoskins features patterns from multiple contributors many of whom have blogs and websites where you can find more of their creations.  The book is organized by type of fabric so all that you have to do is look where you keep your fabrics, decide which one you want to use, then flip to the appropriate section to find a fun project to make.  


Since I received an electronic version of the book for review, I can't comment on the quality of the pattern pieces themselves.  However, I found many of the ideas in the book to be ones that I hadn't seen before.  My favorites included an apron with hot pads sewn in (very useful!), an umbrella, and a manatee (Yes, a toy one. I know, but it's cute.  And I kind of want one.)


After looking through the projects, it seems that the book is best for those with children or those who have family or friends with children.  Since one-yard really is a small amount of fabric, most of the clothing patterns in the book are aimed for small children.  As I mentioned with the manatee, there are also some adorable patterns for stuffed animals.  

Overall, the skill level for the projects included does not seem to be too high.  If you're interested in the book, I'd suggest taking a look at the table of contents to see how many of the projects sound like ones you would want to make.  Probably, if you don't plan to sew for children, there are other books that would be better for you.

Hope you're all having a good week!

Monday, January 16, 2012

Craft: Felt Flower Pillows

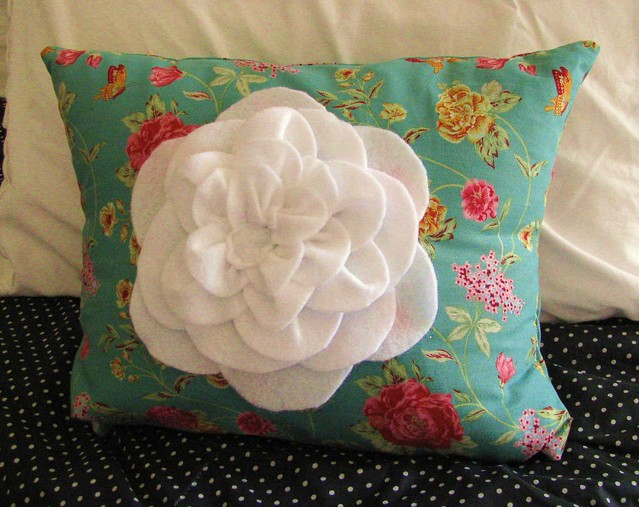
Even though my pinterest boards might have more DIYs than I could ever possibly do, I actually do try to make the things that I have pinned.  When I found a pin for what Allison of Cluck Cluck Sew calls a Petal Pillow, I knew that I wanted to make this pillow to replace the boring throw pillows I already had.

Felt Flower Pillow


All I needed to make these pillows was about 1/2 yard of fabric and 1/4 yard of felt.  To make your own pillows, you can follow Allison's guest tutorial at V and Co here.  

Although I followed Allison's tutorial for the most part, I did make a few changes to my own pillows.  First, since I covered my own pillows instead of using an 18 inch pillow form, I made my own measurements for the fabric.  This also meant that my flower was smaller and had fewer petals.  Don't be afraid to modify the instructions to fit whatever you want to cover.

Allison says that her pillow took about half an hour to make.  The first pillow that I made took me longer than this to make so if sewing isn't your strongest point expect that it might take a little longer for you as well.

Overall, I'm very pleased with my new felt flower pillows.  This tutorial didn't require much material or too much time.  As an added bonus due to my modifications, I was able to reuse pillows that I already had, and I'll also be able to remove the covers when I want to change my pillows up again.

To see some more of the crafts I hope to make from pinterest, you can check out my board here.  

If you've got a board full of craft pins you'd like to share, leave a link to yours in the comments and let us know if you've completed any of them.  


Thursday, June 23, 2011

How to Hem Jeans

 Weheartit
 Hello everyone!  I hope that you're having a wonderful week.  Today, I have a question to ask you.

I always have a problem buying jeans.  If I can actually find some that manage to fit, they always seem to be too long.  I know that I can buy jeans in the petite section, but it is always so annoying when the only thing wrong with a pair of jeans is a few extra inches on the bottom. 

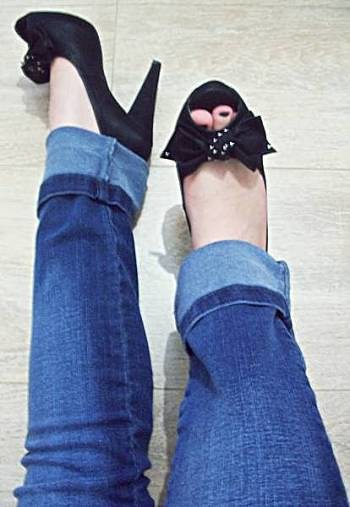
I found a tutorial on how to hem jeans at Sew Much Ado, but I'm a bit afraid to try changing a pair of jeans on my own.  Have you ever tried to hem jeans?  Is it worth is or should I just spend more time searching for shorter jeans that fit just as well?  I could just roll them up? 

Monday, March 7, 2011

Book Review: Little Green Dresses


I recently recieved a new sewing book to review from Netgalley, Little Green Dresses: 50 Original Patterns for Repurposed Dresses, Tops, Skirts, and More by Tina Sparkles.  I was quite excited to look through it, and I wish that I had a sewing machine here in France so that I could have tried some of the ideas.

Little Green Dresses is the kind of book that the younger generation interested in sewing will love.  As the title implies the book focuses on ways to re-use old garments and other sources of fabric and make these into new favorite wardrobe pieces.  In some cases the projects detail how to change a certain type of item, such as a shirt, into another, like a dress.  In other cases, the projects simply suggest finding large objects like old sheets for re-use in new clothing.

While the book contains plenty of green ideas for creating new clothes, it's other
strong point is that it outlines how to create your own patterns.  A beginning section includes things such as making measurements, how to adjust already made patterns, and how to make a
basic pattern for a dress that fits you exactly.  This basic dress pattern is used throughout the project section of the book.  The projects have a good range of difficulties.  There are enough easy projects to get used to making patterns and practice sewing and also enough more challenging projects that you won't get bored.  My favorites of the projects tend to be the dresses and the skirts.


Although there is a section of the book devoted to sewing techniques, the book is not a
sewing reference book.  If you already know the basics of sewing, are interested in learning how to draft your own patterns, and have an interest in re-using and remaking clothes, then this book
will be interesting for you.  The patterns are aimed towards young people who are adventurous when it comes to fashion.  Personally, I would not wear about half of the projects shown in the book despite the fact that I am probably one of the target audience, but since there are 50 projects, that still leaves plenty that I would. 

Monday, January 10, 2011

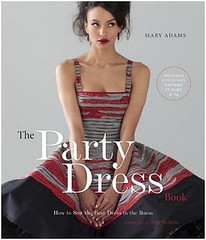
Book Review of The Party Dress: How to Sew the Best Dress in the Room

Although I wasn't looking to find this book, when I walked by the stand of new books at the public library (one of my favorite places), the cover of this book instantly caught my eye.

The Party Dress Book: How to Sew the Best Dress in the Room by Mary Adams contains sections detailing Mary Adams' career as a designer, being inspired by colors, sewing techniques, and a final section on how to sew your own party dress.  The book also includes a pattern which I was unable to view in this copy.

If you are looking for inspirations on creating dresses that stand out from any other dresses you might see on others, then this book could be what you are looking for.  Especially if you like lots of ruffles and fun colors.

I, personally, don't think that my sewing skills are quite up to creating dresses as beautiful as the dresses shown in the book.  However, I would love to learn to make dresses like those.  So, I've now added the book to my already impossibly long wish list.  Some other books about more basic sewing will probably come before I purchase this one, but then again, I may get it just to look at the inspiring pictures.

LinkWithin

Related Posts Plugin for WordPress, Blogger...