Showing posts with label DIY. Show all posts

Thursday, January 22, 2015

How to Rock a Pinterest Project


Are your pinterest boards full of artsy DIYs and handmade awesomeness that never actually become reality? Do your attempts to sew that lace dress you pinned end up as a major fail? Is your closet full of craft supplies from half-finished projects or, even worse, projects you never even started?

If so, that's perfectly ok.

I'm here today to tell you that you can actually complete a pinterest project without having that major fairy dust that some people seem to have. You know that girl who shows up at a party with homemade cookies wearing handcrafted earrings and a skirt she whipped up under 30 minutes. If you follow my advice below, you can be her.

Well, maybe not completely.

Let's not get carried away.

Try one project first, and then move on from there.


Steps to Rocking a Pinterest Project


1. Choose your project with care. This first step is one of the most important parts of completing a project. Don't set yourself up to fail before you start. Take the following things into consideration.
    • How simple or difficult does the craft seem to be? Don't try to start with a complicated project if you don't feel sure of your skills.
    • How much time will the project take? Are you capable of dedicating that much time to working on it?
    • Do you actually want to complete the project yourself? If all you want is the finished product, you might be better off buying something similar.
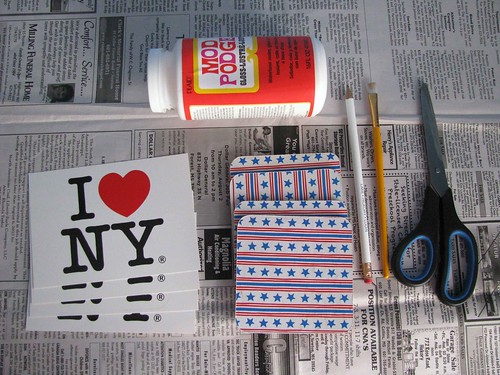
    • Are the materials difficult to find/buy? And, will your budget allow you to buy everything that you need?
    • If the project is on a blog, check the comments below. People may have suggestions or comments about what worked or didn't work for them with the project.
2. Clear a time to make the project.
    • Block off time on your calendar for your project.
    • Allow yourself some extra time to finish the project. It may take longer than you think, and you don't want to have to rush the process.
3. Buy/gather the materials needed for the project.
    • Notice that this step comes after you decide the time that you are going to dedicate to making the project. You want to prevent supplies from unmade projects from gathering in your storage where all they will do is make you feel bad for never even beginning your project.
    • If you plan on substituting different materials than the ones the project calls for, be aware that it may change some of the steps you need to take while making the project. Don't let that stop you from being creative though. After all, that's why you're doing this.
4. Double check that you have everything you need.
    • There is nothing worse than running out of supplies in the middle of a project. It will throw off your groove. And, everyone who's seen The Emperor's New Groove knows that bad things happen when something throws off your groove.
5. Reread/Possibly print the directions.
    • Do you actually know how to do everything that the directions tell you to do? If not, this is the time to turn to youtube. A video of someone sewing a ruffle may be more helpful than just a description.
    • Keep the directions in front of you as you work. Especially if your project is complicated. You don't want to accidentally skip step number 2 and have to start over again when you find the problem at step number 15.
6. Enjoy the process.
    • Making your project should be fun. Yes, some parts may be difficult, but if you repeatedly get frustrated, it may be time for a break.
    • Consider listening to music or a podcast during repetitive tasks. Because you need something to do if you have to cut 100 petals out of an old map.
    • Maybe invite a buddy over to chat while you both work on projects.
7. Enjoy your finished project.
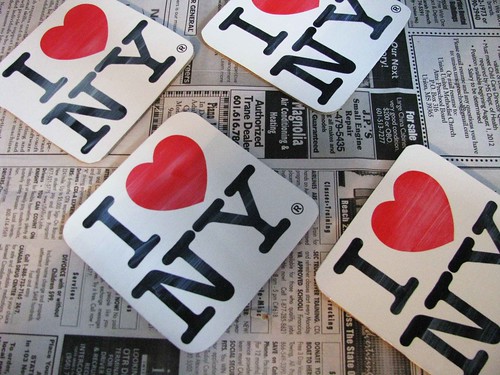
    • Congratulations, you have successfully finished a project. Even if it isn't perfect, you made it, and that's great!
    • Use it. Show it off!
    • If you like the finished project so much that you want to make another, think about what you would want to do differently next time. Maybe make a note about the tricky parts so that you remember later.

So, there it is. Hopefully, these tips will give you some aid while attempting your pinterest project.

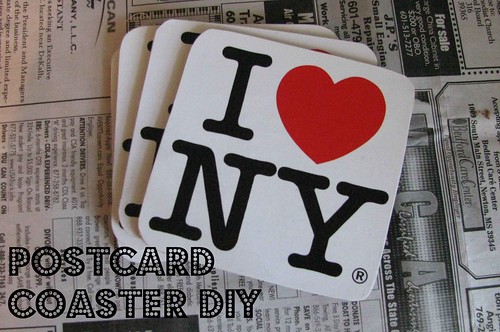
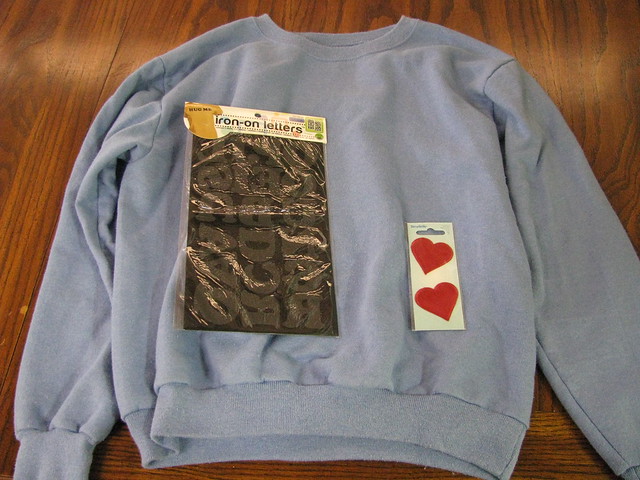
Need some inspiration? Try one of our DIYs.

Take a quick look through our pinterest for some ideas and follow to see more added regularly. Now, stop just pinning things on pinterest and start making them.

Wednesday, June 25, 2014

Souvenir Coaster DIY

For those of you who missed my DIY guest post at Sweet Pea Sylvia's a while back, I'll be sharing it with you today. Here's how to make souvenir coasters out of all those postcards you buy while traveling.

Postcard Coaster Finished Text


Postcard Coaster Supplies
For supplies you'll need: Modpodge, postcards, old coasters, a pencil, a paintbrush, scissors and a clear enamel spray (not pictured)


Postcard Coaster Trace
Step One: Trace the outline of your coasters on the front of the postcard.


Postcard Coaster Cut
Step Two: Cut the postcard along the lines you traced.


Postcard Coaster First Coat
Step Three: Apply a layer of modpodge directly on the coaster.  Then place the postcard cut-out over the coaster.


Postcard Coaster Second Coat
Step Four:  Apply a topcoat of modpodge over the coaster.  Don't worry, it will dry clear.


Postcard Coaster Dry
Step Five:  Allow the coasters to dry, and then, seal with a clear enamel topcoat.  Once dry, your coasters are ready to use.


Friday, January 24, 2014

DIY Doctor Who Sweatshirt

The DIY we're sharing with you today will probably only make sense if you're a Doctor Who fan or if you know someone who is.  If you're not familiar with Doctor Who, it's easiest just to say that it's a sci-fi show on BBC.  Actually describing the show would be almost impossible.

Although our love of the show isn't as full-fledged as some (we're still behind on the season and have yet to see the 50th anniversary special), we catch it whenever we can.

This DIY sweatshirt is great as a subtle, fun piece for Doctor Who fans.  It's a cute sweatshirt that's easy to make and involves little time.  This DIY is almost too simple to need instructions.


For this DIY, you'll need:
- a sweatshirt (we used a Hanes sweatshirt)
- iron-on letters
- two heart patches


Step One:  Following the instructions on the iron-on letters, remove your letters from the package and arrange on the sweatshirt.  Make sure to leave space for the two hearts.  Once you are satisfied with the placement, follow the instructions with your iron-on letters to adhere them to the sweatshirt.

Step Two:  Decide how you would like to attach the two hearts to the sweatshirt.  You'll either want to sew the hearts on or iron them on depending on what type of patch you are using.

Step Three:  Enjoy your sweatshirt while catching up on the 50th Anniversary episode.


This sweatshirt would also make a great gift for someone who likes Doctor Who.

Wednesday, September 4, 2013

No Scrub Bathtub Cleaning

No Scrub Bathtub Cleaning

                  Graphic courtesy of polyvore.com

I came across this time saving trick when I bought the book All-New Hints from Heloise Updated at a library book sale. While it's not the 90's anymore, Heloise's hints are still very effective and simple, so if you come across a cheap copy, I'd highly recommend it. Here's what you'll need for her easy tub cleaner.

1/4 cup baking soda
1/2 cup vinegar
1 cup clear ammonia
1 gallon warm water
a sponge mop

Simply mix the ingredients in a bucket. Dip your sponge mop in into the mixture and run it over the tub. Then, when you're done, rinse the tub with water. You should find that whatever residue is on your tub just runs off without scrubbing. You might also want to make sure that you leave the bathroom door open for ventilation. When I've used it, the smell has not been overpowering like with other cleaners, but it's always good to be on the safe side. Do you have any bathroom cleaning tips and tricks? Let us know! 

Thursday, January 31, 2013

DIY Glitter Coasters


Glitter and Postcard Coasters Text


When I made the DIY Postcard Coasters, I also made two gold glitter coasters with the two extra coaster I had left.  I've got both the glitter and postcard ones on my coffee table, and I like the way they look together.

The process for making the Glitter Coasters is fairly simple.


Glitter Coaster Supplies 
For supplies you'll need: Modpodge, glitter, old coasters, and a paintbrush.


Glitter Coaster First Coat 
Step One:  Apply a coat of modpodge directly to the top of the coaster.


Glitter Coaster Glitter 
Step Two:  Cover the modpodge with glitter.  You'll want to have paper underneath to catch the excess glitter.  I'd also advise using another sheet of paper on top to press down the glitter.  Wait for the modpodge to dry.  Then, shake off the excess glitter.


Glitter Coaster Second Coat 
Step Three:  Cover the glitter with a second layer of modpodge.  Don't worry, it will dry clear.  If there are any bare spots, you'll want to repeat the process in those areas.  Otherwise, you're finished once the modpodge dries.


Glitter Coaster Finished 
Now you can enjoy your new sparkly coaster.  

Monday, September 24, 2012

Sew 50s: Guest Post from Sue

Today we have a guest post from Sue at Chevron and Lace.  Her blog has awesome DIYs as well as personal posts and photos.  We're happy to have her here! - Elizabeth

Tell me if you were one of these kids:

In elementary school, Mom did all your shopping. You didn’t care what you wore, as long as it didn’t get in the way of your play time and Mom didn’t care if it got dirty. Then you hit sixth grade and all of a sudden, what you wore mattered. If sixth grade wasn’t bad enough, you entered Junior High (Middle school, whatever). Not only did your clothes matter, but where you got them! American Eagle and Hollister were the peak of Junior High fashion, but for those of us whose mothers were thrifty and still bought our clothes, it was a tragedy. “JC Penney’s again?” It’s like a mother’s worst nightmare. All of a sudden your child cared about what they wore!

Then came high school. Some maintained their American Eagle and Hollister ideal. Some broadened their horizons and went to the Buckle. Some went the Hot Topic route. Some had no idea what they liked. I was the “No idea what I like” type. Mom left me out to dry with my clothing choices and I was in the dark. The problem was that I liked so many of the styles! I would wake up in the morning and try on five or six different outfits before I decided on one!

Finally I went to college and figured out what I liked, and that was it. Maurices. Maurices, Maurices, Maurices. That was my one style.

Although I still loved Maurices, once I graduated from college, I graduated from the “one type of style” mindset, too. Now I’m a mother and as so many mothers before me can attest, once you have a child of your own, you somehow turn into the mother that raised you. I’ve become my own thrifty mother and decided that some clothes at the store are not worth the price. So what did I do?


Welcome to my blog! I graduated from college, Mom bought me a sewing machine and I’ve never looked back! I am in LOVE with DIY and am a recent convert to vintage! Here’s the latest and greatest of my vintage looks…

Sew 50s!

Headband: Bought ¾ yrd. from Joann’s for less than $2.00!
Shirt: Just a regular ‘ol three quarter sleeve from Downeast Basics
Clutch: Bought it from DEB years ago
Skirt: Homemade skirt!
Shoes: Journey’s (on sale!)

In fact, I had enough left-over from the headband to make a shirt!

In addition to clothes (tutorials included!), I make my own home décor, I write cutesy poems, make delicious food (treats are my favorite!), run, and have the cutest little girl around with a hunk of a husband to boot! Get to know me and my family on my blog, Chevron and Lace.

Monday, August 6, 2012

BTCG: DIY Recycled Decorating Projects

Back to College Guide


Welcome to the first part in our Back to College Guide.  Even if you aren't a college age student, I hope you'll find these posts interesting and please feel free to share them with any college students that you know.


It's about that time when college students begin moving back into dorms, apartments, and houses near campus.  This means calling roommates and going shopping for furniture and decorations.  Since extra funds can be limited for most college students, DIY is a good way to decorate with unique pieces without creating financial stress.

There are so many sites that feature creative decorating ideas.  Today we're featuring projects that involve using recycled materials you probably already have because respecting the environment and saving money are a combination that make a good start to the school year.


T-shirt shag rug tutorial


craft storage
Craft Storage at BH&G


bathroom organizer


chalkboard tutorial
Chalkboard Tutorial by Sweet Mint Studios


metal flowers from soda cans
Metal Flowers from Soda Cans at Crissy's Crafts


Of course, all of these do it yourself recycled projects are suitable for decorating any space, college dorm room or not.

Check out the second and third posts in this series - Microwave Recipe Treats and Guide to Writing an Essay.


Wednesday, February 8, 2012

Book Review - Sweat Shop Paris

Sweat Shop Paris


I'd never heard of the Sweat Shop in Paris when I saw this book available for review on Netgalley, but it seemed so interesting that I decided to take a look at it anyway.

The book Sweat Shop Paris: Lessons in Couture from the Sewing Cafe by authors Martena Duss and Sissi Holleis begins with the story of how the sewing workshop/coffee shop first came into being.  The Sweat Shop is a place where crafters can gather to exchange ideas and rent machines by the hour to do their crafting.

I'm not sure what I was expecting, but this book is not like any other craft or sewing book that I've seen.  Since my taste runs more to the simple and classic, I probably wouldn't be interested in any of the projects in the book.    However, the book intrigued me because in addition to a sewing section, there was also a section on knitting, a section on customizing pre-made pieces, one on decorating, one on how to use different techniques like weaving leather, another with recipes, and a final one with a guide to sewing, crafting, food, clothing and general useful yet cool places in Paris.

In order to be able to use this book, you'll need to have at least the basic of sewing covered.  I'd say that it might be frustrating for someone who is just starting out.  As far as knitting, I can't judge the difficulty of those projects since I don't knit.

I would say this book is definitely for someone who's interested in the more in and edgy side of DIY and crafting.  All of the projects are unconventional and feature techniques that aren't commonly used. If it just isn't quite your style, that's perfectly ok.  As much as I love Paris, it isn't quite for me either.  I'd suggest clicking through a few of the preview pages on Amazon.  If you like what you see there, then you'll love this book.

Monday, January 30, 2012

How to Save Stinky Shoes

You know those cute shoes you have that you have that you can't wear socks with? Shoes like your ballet flats, your Sperry's, or your moccasins. Eventually, those shoes get stinky, and usually there's no good way to wash them without risking ruining your favorite shoes! Well, I have found a solution for you. All you need is a little baking soda.

Take your shoes and sprinkle baking soda onto the soles until the soles are covered. You might want to go outside or put some newspaper under the shoes while you're sprinkling to prevent a mess. Then, let the baking soda sit in the shoes for a few days (I only let mine sit for a day). Once you're satisfied that the shoes have sat long enough for the baking soda to soak up any odor, you can either shake your shoes out outside, or you can vacuum up the baking soda. I would suggest doing both. After you shake and vacuum your shoes out, they should smell good as new!

I tried this baking soda trick with my Sperry's and was delighted with the results. It was much more effective and easier on my shoes than using the washing machine. My shoes were a little fuzzy on the inside, so the baking soda really settled into the material. I'm not sure if this may have been why the baking soda worked so well, so try it out for yourself and let us know what you think!

Monday, January 16, 2012

Craft: Felt Flower Pillows

Even though my pinterest boards might have more DIYs than I could ever possibly do, I actually do try to make the things that I have pinned.  When I found a pin for what Allison of Cluck Cluck Sew calls a Petal Pillow, I knew that I wanted to make this pillow to replace the boring throw pillows I already had.

Felt Flower Pillow


All I needed to make these pillows was about 1/2 yard of fabric and 1/4 yard of felt.  To make your own pillows, you can follow Allison's guest tutorial at V and Co here.  

Although I followed Allison's tutorial for the most part, I did make a few changes to my own pillows.  First, since I covered my own pillows instead of using an 18 inch pillow form, I made my own measurements for the fabric.  This also meant that my flower was smaller and had fewer petals.  Don't be afraid to modify the instructions to fit whatever you want to cover.

Allison says that her pillow took about half an hour to make.  The first pillow that I made took me longer than this to make so if sewing isn't your strongest point expect that it might take a little longer for you as well.

Overall, I'm very pleased with my new felt flower pillows.  This tutorial didn't require much material or too much time.  As an added bonus due to my modifications, I was able to reuse pillows that I already had, and I'll also be able to remove the covers when I want to change my pillows up again.

To see some more of the crafts I hope to make from pinterest, you can check out my board here.  

If you've got a board full of craft pins you'd like to share, leave a link to yours in the comments and let us know if you've completed any of them.  


Tuesday, April 19, 2011

What to Do After You Wash Your Sperrys and the Laces Won't Go Back Into the Holes


If you have ever attempted to wash your Sperrys, you either left the laces in the shoes, thus ruining your laces or took them out and now have no idea how to get them back into the shoes. I did the second one, and my solution was to put ribbons in the place of the laces since they are thin enough to double over and still fit through the eyelets. I will take you through the steps of how I got the ribbon through the holes.


You will need ribbon, clear nail polish, tape, and a large bobby pin.

1. Thread the ribbon in between the two prongs of the bobby pin and push the ribbon down to the closed end.
2. Tape the end of the ribbon so that the ribbon forms a loop around the closed end of the bobby pin. Then, the ribbon will stay on when you pull it through the loops. The ribbon and bobby pin should resemble a needle and thread.
3. After you have the bobby pin and ribbon attached, you can slide the bobby pin into the eyelets and pull them through.

The solution is much prettier than my previous solution of simply lacing the shoes with old leather shoe strings in the front.

LinkWithin

Related Posts Plugin for WordPress, Blogger...