Thursday, January 31, 2013

DIY Glitter Coasters


Glitter and Postcard Coasters Text


When I made the DIY Postcard Coasters, I also made two gold glitter coasters with the two extra coaster I had left.  I've got both the glitter and postcard ones on my coffee table, and I like the way they look together.

The process for making the Glitter Coasters is fairly simple.


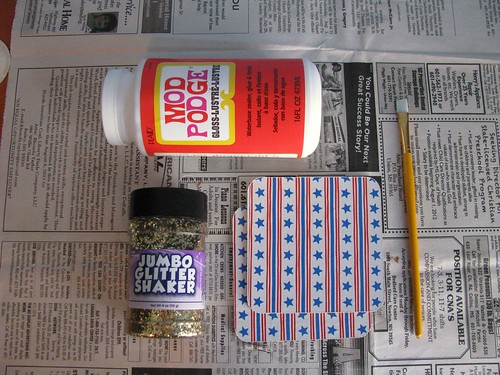
Glitter Coaster Supplies 
For supplies you'll need: Modpodge, glitter, old coasters, and a paintbrush.


Glitter Coaster First Coat 
Step One:  Apply a coat of modpodge directly to the top of the coaster.


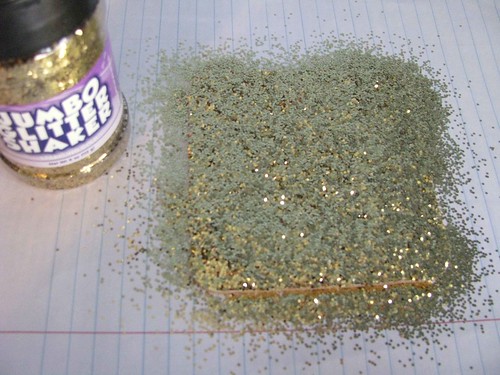
Glitter Coaster Glitter 
Step Two:  Cover the modpodge with glitter.  You'll want to have paper underneath to catch the excess glitter.  I'd also advise using another sheet of paper on top to press down the glitter.  Wait for the modpodge to dry.  Then, shake off the excess glitter.


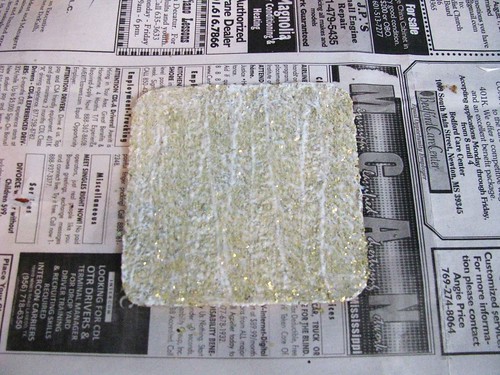
Glitter Coaster Second Coat 
Step Three:  Cover the glitter with a second layer of modpodge.  Don't worry, it will dry clear.  If there are any bare spots, you'll want to repeat the process in those areas.  Otherwise, you're finished once the modpodge dries.


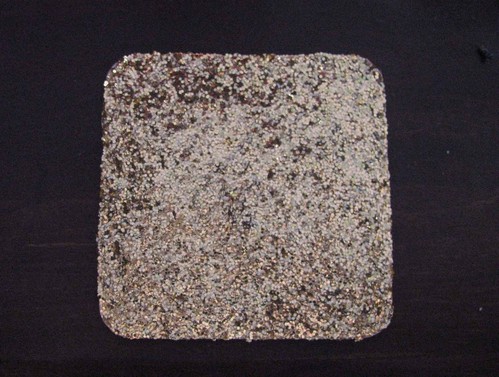
Glitter Coaster Finished 
Now you can enjoy your new sparkly coaster.  

Friday, November 16, 2012

Guest Post: Souvenir Coaster DIY

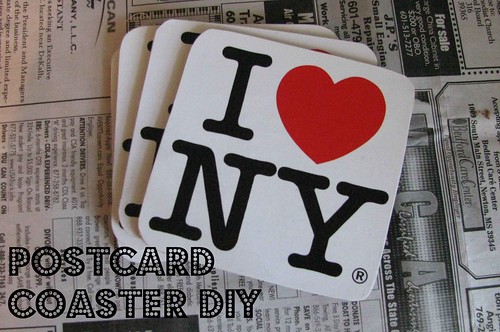
Postcard Coaster Finished Text

Be sure to check out Sweet Pea Sylvie for a guest post that I did on how to make coasters out of your souvenir postcards.  Take a look here.  You'll want to stay on her blog for a while to read the awesome things she posts.

 Update Sweet Pea Sylvie no longer exists so I've reposted the Souvenir Coaster DIY for all of you who'd like the directions.

Wednesday, October 17, 2012

Keeping up with Life of Lovely

Hi everyone!

Thanks for reading our blog.

We'd just like to remind you about different ways you can keep up with us.


Have a lovely day!


Thursday, October 4, 2012

Two Minute Make-up Routine

Two Minute Make-Up Routine

Getting ready in the morning after spending the night with a few friends, I suddenly realized that I’m the only one of us who wears make-up every day.  As we talked while I carefully applied mascara in the bathroom mirror, my friends discussed how they usually felt too rushed in the morning to bother with make-up. 

It seems like many women feel the same way, but putting on make-up in the morning doesn’t have to be a production.  For an everyday look, a simple make-up routine that enhances rather than hides or changes your features is easy to follow.  At most my basic routine takes 2 minutes leaving plenty of time for your beauty sleep.

Step One: Sunscreen

Even if you decide to wear no make-up at all, sunscreen is essential.  Protecting your skin will keep it healthy in the long run.

Step Two: Foundation

Don’t feel that your foundation has to cover every inch of your face.  As long as the shade matches your skin, you only need to cover up areas that are red or uneven. 

Step Three: Mascara

Using small strokes, coat only your top lashes with mascara.  For everyday make-up, mascara on the bottom lashes really isn't necessary.  Take your time since rushing this step usually causes mistakes.

Step Four: Lipstick

For the finishing touch, lipstick, you can use a color close to your natural color.  However, swiping a bright color just in the center, the using your finger to spread it like a lip balm creates a more natural looking color.

With only four steps and four products, you have an almost effortless, basic routine that you have time for each morning.


What does your make-up routine look like?


Monday, October 1, 2012

49 Dresses: Shabby Apple Giveaway!

Just thought some of you might want to enter the giveaway on one of my favorite blogs -

49 Dresses: Shabby Apple Giveaway!: Happy October guys! To start off the month, I've got a wonderful giveaway to share with you guys. Shabby Apple , one of my favorite retro a...

Book Review: The Brontes: Wild Genius on the Moors


 Most recently, I've just finished reading a book called The Brontës: Wild Genius on the Moors: The Story of a Literary Family by Juliet Barker.  I didn't know too much about the Brontës before I started reading.  Of course, I knew there were three sisters, and I've read Jane Eyre and Wuthering Heights.  That hardly makes me a scholar in this area though.

According to Barker, most of the traditional accounts of the Brontë sisters make many misrepresentations about their lives.  One of the purposes of this book is to look at accounts not studied before in order to dispel what she calls the Brontë myths.  The book covers the entire family, not just Charlotte, Emily, and Anne.  Like I said, this isn't an area I've studied, so I have no idea about the history, but this didn't hinder my enjoyment of the book.

The book was more interesting than I had imagined it would be before I started reading (a good thing because it's over a thousand pages long.)  Barker is good at writing and transitioning from one subject to another.  After finishing the book, I now want to reread the two books I've already read and add more of the Brontës' books to my reading list.  If you've enjoyed any of the Brontës' books, Barker's The Brontës will be an interesting read.  I certainly enjoyed it!

Monday, September 24, 2012

Sew 50s: Guest Post from Sue

Today we have a guest post from Sue at Chevron and Lace.  Her blog has awesome DIYs as well as personal posts and photos.  We're happy to have her here! - Elizabeth

Tell me if you were one of these kids:

In elementary school, Mom did all your shopping. You didn’t care what you wore, as long as it didn’t get in the way of your play time and Mom didn’t care if it got dirty. Then you hit sixth grade and all of a sudden, what you wore mattered. If sixth grade wasn’t bad enough, you entered Junior High (Middle school, whatever). Not only did your clothes matter, but where you got them! American Eagle and Hollister were the peak of Junior High fashion, but for those of us whose mothers were thrifty and still bought our clothes, it was a tragedy. “JC Penney’s again?” It’s like a mother’s worst nightmare. All of a sudden your child cared about what they wore!

Then came high school. Some maintained their American Eagle and Hollister ideal. Some broadened their horizons and went to the Buckle. Some went the Hot Topic route. Some had no idea what they liked. I was the “No idea what I like” type. Mom left me out to dry with my clothing choices and I was in the dark. The problem was that I liked so many of the styles! I would wake up in the morning and try on five or six different outfits before I decided on one!

Finally I went to college and figured out what I liked, and that was it. Maurices. Maurices, Maurices, Maurices. That was my one style.

Although I still loved Maurices, once I graduated from college, I graduated from the “one type of style” mindset, too. Now I’m a mother and as so many mothers before me can attest, once you have a child of your own, you somehow turn into the mother that raised you. I’ve become my own thrifty mother and decided that some clothes at the store are not worth the price. So what did I do?


Welcome to my blog! I graduated from college, Mom bought me a sewing machine and I’ve never looked back! I am in LOVE with DIY and am a recent convert to vintage! Here’s the latest and greatest of my vintage looks…

Sew 50s!

Headband: Bought ¾ yrd. from Joann’s for less than $2.00!
Shirt: Just a regular ‘ol three quarter sleeve from Downeast Basics
Clutch: Bought it from DEB years ago
Skirt: Homemade skirt!
Shoes: Journey’s (on sale!)

In fact, I had enough left-over from the headband to make a shirt!

In addition to clothes (tutorials included!), I make my own home décor, I write cutesy poems, make delicious food (treats are my favorite!), run, and have the cutest little girl around with a hunk of a husband to boot! Get to know me and my family on my blog, Chevron and Lace.
LinkWithin

Related Posts Plugin for WordPress, Blogger...